


How to Grow Chaga Mushrooms
Learn how to grow Chaga with our complete guide. Learn about the process from inoculation and incubation to harvesting and storage.
Chaga mushrooms, a unique type of medicinal mushroom, are becoming increasingly popular for their numerous health benefits. However, not many people know how to grow Chaga in their own homes. This guide will offer you an insight into the world of Chaga growing.
From selecting and preparing your growing medium to inoculating and incubating it, this complete guide covers every step in detail. We'll also discuss creating the perfect fruiting conditions for your chaga mushrooms and how to harvest them when they're ready.
The process doesn't end with harvesting chaga; we'll also share tips on storing your harvested Chaga mushrooms properly so that you can enjoy their goodness over time. So if you've had no luck finding chaga or simply want to try something new, stay tuned as we delve deeper into the fascinating process of growing these medicinal mushrooms.
Table of Contents:
- Choosing the Right Growing Medium for Chaga Mushrooms
- Preparing the Growing Medium
- Inoculating the Growing Medium
- Fruiting Conditions
- Harvesting Chaga Mushrooms
- Storing Your Harvested Chaga Mushrooms
- FAQs in Relation to How to Grow Chaga
- Conclusion
Choosing the Right Growing Medium for Chaga Mushrooms
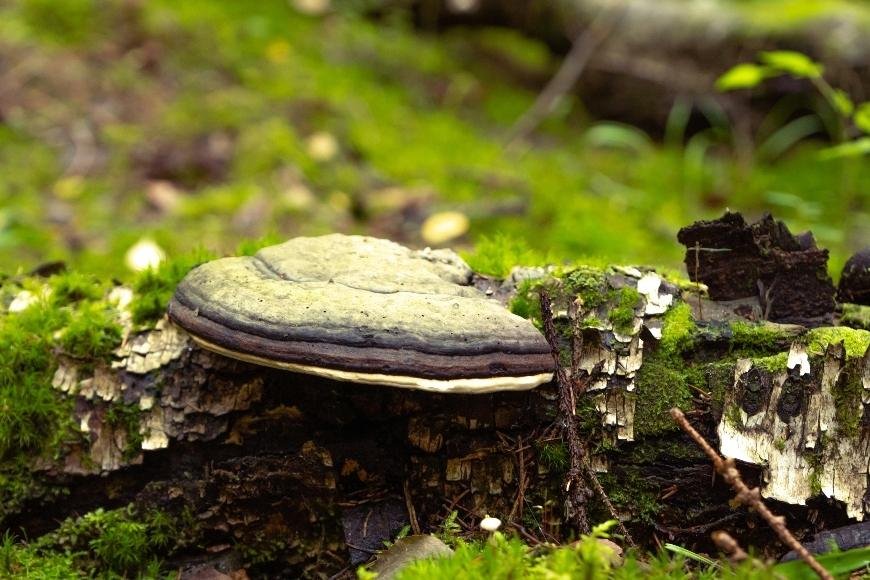
First things first, to grow Chaga mushrooms, you need to select the right growing medium. These fungi thrive on hardwoods like birch, alder, or beech trees. But if you're planning to cultivate them indoors, using organic materials like sawdust or wood chips from these types of trees is a viable alternative. Straw can also work, but it may not provide the same nutrient content needed by Chaga mushrooms.
Sawdust vs Wood Chips vs Straw
- Sawdust: This option provides a fine texture that allows mycelium to spread quickly and efficiently throughout the substrate. It's also relatively easy to sterilize compared to larger pieces of wood. Fungi Perfecti
- Wood Chips: These offer more structure than sawdust and can help create air pockets within the substrate for better oxygenation, a crucial factor in mushroom growth. Yet, sterilizing them is more difficult due to their dimensions and bulkiness. Mushroom People
- Straw: While straw doesn't contain as many nutrients as wooden substrates do, its lightweight nature makes it easier for mycelium colonization, making it another suitable choice for beginners. Fungi Ally
Each type has its pros and cons, so choosing one will depend largely on what resources are readily available and personal preference based on past experiences. Remember that successful cultivation isn't solely dependent on having an optimal substrate; other factors like temperature control and humidity levels also play significant roles.
Preparing the Growing Medium
First things first, let's talk sterilization. You don't want any pesky bacteria or fungi interfering with your Chaga mushroom growth, so it's important to sterilize your growing medium. Boil your chosen substrate, whether it's sawdust, wood chips, or straw, for at least 30 minutes. If you're working with larger quantities, an outdoor burner might be your best bet.
While boiling does kill most contaminants, some tough microorganisms may survive. After boiling, baking the substrate in an oven set to 160-180°F (70-80°C) for two hours will ensure complete sterilization and provide optimal conditions for Chaga mushroom growth before cooling and inoculation. This will provide optimal conditions for your Chaga mushrooms to grow.
Once you've sterilized your growing medium, let it cool before inoculation. High temperatures can kill off the delicate Chaga mycelium spores before they have a chance to colonize their new home.
If you're using sawdust or wood chips, make sure they're fully saturated but not soaking wet when cooled down. For straw, chop it up into smaller pieces around 3 inches long. Proper preparation and handling techniques during this stage of cultivation will significantly increase your chances of success when growing these medicinal fungi.
Inoculating the Growing Medium
Inoculation is a crucial step in growing Chaga mushrooms. It involves introducing mushroom spores into your prepared substrate or growing medium, which initiates the growth of mycelium - a network of tiny white filaments that will eventually give rise to your Chaga mushrooms.
The most common method for inoculating your substrate is by using a liquid culture containing Chaga mycelium spores. Liquid cultures are suspensions of mushroom mycelium in water and nutrients, which can be easily injected into your substrate with a syringe.
Purchase Your Liquid Culture
When purchasing your liquid culture, make sure to get it from an established supplier to guarantee its quality and viability. You can find reputable suppliers online who specialize in mushroom cultivation supplies.
Prepare Your Substrate
Before starting the inoculation process, ensure that your sterilized growing medium has cooled down to prevent killing off any viable spores.
Inoculate The Substrate
Using sterile techniques (such as wearing gloves and working in clean surroundings), inject small amounts of the liquid culture evenly throughout your substrate using a syringe. Be careful not to over-inject as this could lead to overly wet conditions, which might promote mold growth instead of beneficial fungi like our target - Chaga.
This stage requires patience because it takes time for the mycelia network to establish itself within the substrate fully. During this period, keep an eye out for signs such as fluffy white patches on top or within your substrate- these are indicators that everything's going well.
If all goes according to plan after several weeks post-inoculation, you should see full colonization signified by extensive web-like structures covering almost the entire surface area inside the container where you placed them initially - now ready to move onto the next phase: incubation.
Incubating the Growing Medium
Ready to grow some Chaga mushrooms? The next step after inoculating your growing medium with Chaga mycelium spores is incubation. This is where the real magic happens as you create the perfect environment for your Chaga to thrive.
The ideal temperature range for incubating Chaga is between 15-20°C (59-68°F). To achieve this, you can use an incubator. It's crucial to maintain a consistent temperature within this range during incubation. Fluctuations could disrupt growth or even kill off the developing mycelium.
How long until the mycelium completely covers the medium? Strain, environment and nutrients all play a role in determining the amount of time it takes for mycelium to colonize its substrate. Generally, expect several weeks of waiting before moving onto fruiting conditions.
- Maintain Consistent Temperature: Use a thermometer to regularly check if temperatures remain steady within the desired range throughout incubation.
- Avoid Disturbances: Try not to disturb or move around your setup unnecessarily during this stage as doing so may stress out and potentially harm developing fungi.
- Patiently Wait: Patience is key when cultivating any type of mushroom including Chaga. Let nature take its course at its own pace.
If you notice any signs of contamination like unusual colors or odors coming from your setup during incubation phase, discard contaminated parts immediately. These could be harmful bacteria or molds competing with our precious fungi.
If all goes well, after several weeks under optimal conditions inside our carefully controlled environment (the "incubator"), we should see healthy white patches forming across the surface indicating successful colonization by Chaga's mycelial network. Now, it's time to move on to the fruiting stage.
Fruiting Conditions
Chaga mushrooms are fascinating fungi that require specific conditions to grow and thrive. The fruiting stage is especially crucial, as this is when the mushrooms start to form from the mycelium network that has colonized your substrate.
Humidity Levels
Mushrooms are mostly water, so they need a humid environment to grow. To increase humidity levels for your Chaga mushroom cultivation, consider using a humidity dome or tent. Alternatively, you can mist the growing area with distilled water regularly, but don't soak the substrate completely.
Light Exposure
Although mushrooms lack chlorophyll, light plays an essential role in their development. It helps orientate growth direction and trigger fruit body formation. For indoor cultivation of Chaga mushrooms, indirect sunlight or fluorescent lighting will suffice.
Ventilation
Fresh air exchange (FAE) is crucial for healthy mushroom growth. It aids in gas exchange, preventing carbon dioxide buildup while supplying oxygen needed by fungi for respiration. You can achieve proper ventilation by fanning out stale air manually or installing a small fan near your setup, ensuring it doesn't directly blow on them, causing dehydration.
Remember, growing Chaga mushrooms requires a keen understanding of their natural environment and how to recreate it in your growing space. By manipulating humidity levels, light exposure, and ventilation, you can create optimal conditions for fruiting and enjoy a bountiful harvest.
Harvesting Chaga Mushrooms
Harvesting Chaga mushrooms is a crucial step in the cultivation process. It requires careful observation and timing to ensure that you harvest your mushrooms at their peak for maximum potency.
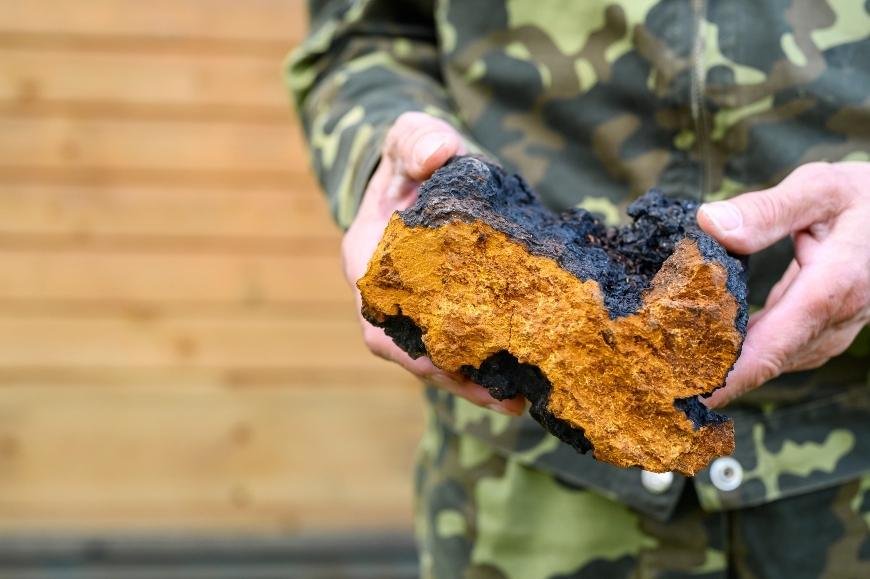
It takes about two to three weeks after initiating fruiting conditions for Chaga mushrooms to reach full maturity. You can tell when they are ready by observing their size and coloration. Mature Chaga will have grown significantly from its initial pinhead size, often reaching several inches in diameter, with a dark black exterior and golden interior.
To harvest your matured Chaga mushrooms, simply twist them gently off the substrate or cut them using a sharp knife close to the base without damaging the mycelium underneath. Be sure not to pull too hard as this could damage the underlying mycelium network which may hinder future growths.
After harvesting, immediately clean any debris off your mushroom before drying them out properly - either by air-drying or using a dehydrator if available.
If you're planning on consuming these potent fungi right away, then feel free. But remember: always start with small doses due to their powerful medicinal properties until you know how they affect you personally.
If instead, you plan on storing these magic gems for later use - perhaps making some therapeutic tea or adding into various recipes - then continue reading our next section where we'll cover proper storage techniques.
Patience is key when growing any type of mushroom, especially one as unique as Chaga. It might take time, but trust us; it's well worth every second spent nurturing these magical fungi.
Proper Storage Techniques for Chaga Mushrooms
Storing your Chaga mushrooms properly is essential to maintain their potency and freshness. Here are some tips:
- Store the dried Chaga in a sealed vessel, away from bright light, in a cool and dry area.
- Label your container with the date of harvest to keep track of its freshness.
- Chaga mushrooms can last up to two years if stored properly.
Now that you know how to harvest and store your Chaga mushrooms, you're ready to enjoy their many health benefits. Whether you're consuming them for their immune-boosting properties or adding them to your favorite recipes, Chaga mushrooms are a versatile and potent addition to any wellness routine.
Storing Your Harvested Chaga Mushrooms
So, you've grown and harvested your Chaga mushrooms - congrats. But, don't let your hard work go to waste by not storing them properly. Here are some tips:
Use an Airtight Container
Make sure to store your Chaga mushrooms in an airtight container to prevent exposure to air, which can lead to mold or bacteria growth. A sealed mason jar or ziplock bag is the best option for keeping your Chaga mushrooms safe from air exposure and maintaining an ideal temperature and humidity.
Control Temperature and Humidity
Store your Chaga mushrooms in a cool and dry place, like a pantry or cupboard. Avoid the fridge or freezer, as they can affect the potency of the mushrooms. Also, keep them away from direct sunlight to prevent the breakdown of active compounds.
Check Before Consuming
Stored properly, your Chaga mushrooms can last up to one month. However, always check before consuming. If they look discolored or smell off, discard them immediately.
Chaga mushrooms, a longstanding part of traditional medicine, have been long prized for their many health benefits such as enhancing immunity and alleviating inflammation. If you're interested in using them beyond just eating raw or cooking into meals, consider making tinctures, teas, powders, etc. Easy methods of utilizing Chaga mushrooms in your lifestyle can be done with minimal effort.
Proper storage methods ensure that all those hours spent growing Chaga mushrooms don't go to waste and give us flexibility when deciding how exactly we want to enjoy the fruits of our labor.
FAQs in Relation to How to Grow Chaga
How long does it take to grow chaga?
Chaga typically takes 3-5 years to mature in natural conditions.
Can you grow chaga at home?
Yes, with the right equipment and patience, you can cultivate Chaga mushrooms at home.
What does chaga do to your brain?
Research suggests that Chaga may have neuroprotective effects and enhance cognitive function.
Where does chaga grow in the US?
Chaga is commonly found in northern regions of the United States, particularly on birch trees in Alaska, Michigan, and North Carolina.
Don't wait 3-5 years to enjoy the benefits of chaga, grow it at home with the right equipment and patience.
Conclusion
Growing Chaga mushrooms can be a fun and rewarding experience for those interested in recreational drug use, and by following these steps, you can become an expert on how to grow Chaga successfully. Select the right growing medium, prepare it properly, inoculate it with spores or mycelium, incubate it at the right temperature and humidity levels, provide optimal fruiting conditions, harvest your mushrooms carefully when they are ready, and store them correctly for future use. Remember, patience and attention to detail are key!


