


How to Grow Galangal
Learn how to grow Galangal with our beginner's guide, covering planting, care, and harvesting. Unlock your gardening potential today!
Are you interested in learning how to grow Galangal? This exotic herb, a relative of ginger, is prized for its distinct taste and medicinal benefits. Growing galangal can be an exciting addition to your garden or indoor space.
In this guide, we'll provide you with the necessary tips and tricks for successfully cultivating galangal plants in your garden or indoor space, no matter where you live. We'll also discuss how to adapt these techniques for different regions so that you can successfully cultivate this low maintenance plant regardless of where you live.
Get ready to embark on a rewarding journey as we dive deep into the world of growing galangal!
Table of Contents:
- Choosing the Right Location
- Sunlight Exposure
- Soil Type
- Drainage Considerations
- Planting Galangal
- Watering and Fertilizing
- Controlling Weeds
- Pest Control
- Harvesting Galangal
- Growing Galangal in Different Regions
- FAQs in Relation to How to Grow Galangal?
- Conclusion
1. Choosing the Right Location
Growing galangal requires careful consideration of the location, as this tropical plant thrives in specific conditions. To ensure a successful crop, you must think about elements such as light exposure, soil type, and water flow.
Sunlight Exposure
Galangal plants love sunlight and warmth. For optimal growth, galangal plants require at least 6-8 hours of direct sunlight daily. If you live in an area with limited sun exposure or colder temperatures, consider growing your galangal indoors near a sunny window or under grow lights.
Soil Type
The right soil is crucial for healthy galangal growth. For optimal growth, galangal prefers soil that is both loamy and sandy with a good amount of organic matter. A mixture of loamy and sandy soils works best to provide proper nutrients while preventing waterlogging issues. You can improve your garden's existing soil by adding compost, aged manure, or other organic materials before planting.
- pH level: Galangal grows best in slightly acidic to neutral pH levels (5.5 - 7).
- Avoid clayey soils: Heavy clay soils may cause poor drainage and hinder root development.
Drainage Considerations
Proper drainage is essential for growing healthy galangal plants since their rhizomes are prone to rotting if left sitting in waterlogged soil for too long. Ensure that your chosen location has adequate drainage by conducting a simple test:
- Dig a cavity about twelve inches deep and fill it with liquid.
- Allow the water to drain completely, then refill the hole.
- Measure how long it takes for the water to drain again. If it takes less than an hour, your drainage is sufficient. If not, consider amending your soil or selecting a different location.
If you're growing galangal in containers, make sure they have drainage holes at the bottom and use well-draining potting mixtures like those designed for cacti or succulents.
Choosing the right location is essential for a successful galangal harvest. It should provide adequate sunlight, water drainage and soil nutrients. Now that you have chosen your ideal spot, it's time to get planting.
2. Planting Galangal
Growing galangal at home is an exciting endeavor for anyone interested in exploring the world of recreational plants and substances. The process begins with planting the rhizomes, which are similar to ginger roots, and nurturing them into thriving plants.
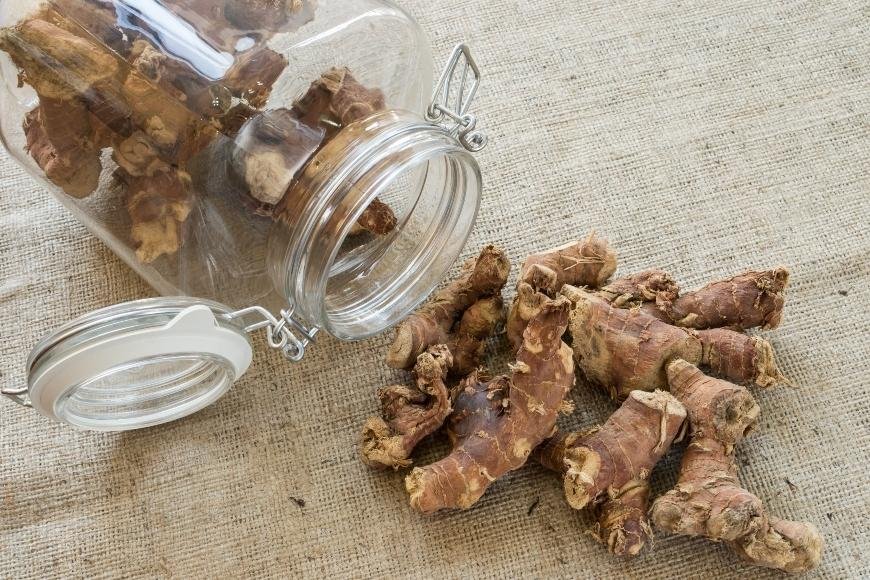
Selecting Rhizomes
To start your galangal journey, you'll need to acquire some healthy galangal rhizomes. Look for plump pieces with a few growing buds or eyes on them. You can find these at local nurseries or online plant shops that specialize in exotic herbs.
When to Plant
For best results, plant galangal in the spring when temperatures are consistently above 50°F (10°C) to ensure soil warmth and minimize frost damage. Ensuring the earth is sufficiently warm for ideal development and decreasing chances of frost harm can be accomplished by planting galangal during spring when temperatures are consistently above 50°F (10°C).
Preparing the Soil
- Choose well-draining soil: Galangals prefer loamy or sandy soils with good drainage capabilities. Avoid heavy clay soils as they tend to retain too much water, leading to root rot.
- Aerate and loosen up compacted soil: Use a garden fork or tiller to break up hard-packed earth before planting your rhizomes. This will allow air circulation around their roots while also promoting better water absorption.
- Add organic matter: Incorporate compost or aged manure into your chosen site several weeks before planting - this will improve overall soil fertility and structure while providing essential nutrients needed by growing galangal plants.
Planting the Rhizomes
Follow these steps to plant your galangal rhizomes:
- Dig a hole: Create holes about 4 inches (10 cm) deep and 12 inches (30 cm) apart in your prepared soil. This spacing will give each plant enough room to grow without competing for resources.
- Place the rhizome: Position one rhizome horizontally in each hole, with its growing buds facing upwards. Ensure that it is completely covered by soil - this will protect it from drying out or being eaten by pests.
- Cover and water: Fill the holes back up with soil, gently patting down around the planted rhizomes. Water them thoroughly after planting to help settle the earth and encourage root growth.
In just a few weeks, you'll start seeing shoots emerging from your planted galangal rhizomes as they begin their journey towards becoming fully-grown plants.
Planting Galangal is a relatively simple process, however it requires careful attention to the soil and climate conditions in order to ensure successful growth. Watering and fertilizing your galangal plants require mindful thought to make sure they grow successfully.
3. Watering and Fertilizing
Growing galangal requires proper watering and fertilization to ensure a healthy plant with an abundant harvest. In this part, we will explore the optimal methods for providing your galangal with adequate hydration and nourishment.
Watering Galangal
Galangal plants thrive in moist soil conditions but are sensitive to overwatering or waterlogged soils, which can lead to root rot. To maintain the ideal moisture level, follow these tips:
- Frequency: Water your galangal every two days during hot weather or when the top inch of soil feels dry. During cooler months or periods of rain, reduce watering frequency accordingly.
- Mulching: Apply a layer of organic mulch around the base of your plant to help retain moisture and regulate soil temperature. This is especially important in warmer climates where evaporation rates are high. You can use materials like straw, leaves, or wood chips as mulch.
- Drip Irrigation: Consider installing a drip irrigation system if you're growing multiple plants or have limited time for manual watering. Drip systems deliver water directly to the roots while minimizing waste through evaporation and runoff.
Fertilizing Galangal
To support robust growth and rhizome development in your galangal plants, it's essential to provide them with adequate nutrients throughout their lifecycle. Here's what you need to know about fertilizing your plants:
- Type of Fertilizer: Select an organic fertilizer that is rich in nitrogen (N), phosphorus (P), potassium (K) such as composted manure, fish emulsion or a balanced N-P-K granular fertilizer. Nitrogen promotes leafy growth, phosphorus supports root development and potassium aids in overall plant health.
- Application Frequency: Apply the chosen fertilizer every two months during the growing season (spring to fall). For immature plants, utilize half of the suggested measure on the item name to dodge over-fertilization.
- Foliar Feeding: In addition to soil fertilization, you can provide your galangal with extra nutrients through foliar feeding. Mix a water-soluble fertilizer at half strength and spray it directly onto leaves once every four weeks during active growth periods. This method allows for faster nutrient absorption by bypassing the roots.
Incorporating these watering and fertilizing techniques into your galangal care routine will ensure that your plants receive all they need for vigorous growth and an abundant harvest. Keep an eye on your plants, as their requirements may differ depending on the environment, soil type and age; make any necessary changes to ensure they get what is needed for healthy growth and plentiful yields.
Proper watering and fertilizing are essential for growing galangal, so it's important to be mindful of these factors. Moving on, controlling weeds is the next step in cultivating a successful crop of galangal.
4. Controlling Weeds
Weeds can be a real nuisance when growing galangal, as they compete with your plants for nutrients and space. Fortunately, there are several effective methods to keep weeds under control in your galangal garden.
Mulching
Mulching is an excellent way to suppress weed growth while also providing additional benefits such as moisture retention and temperature regulation. To mulch your galangal garden, spread a 2-3 inch layer of organic material like straw, wood chips, or compost around the base of each plant. Covering the soil around each plant with an organic layer of material, such as straw, wood chips or compost, can impede weed seed germination by obstructing sunlight and making it difficult for them to establish.
Hand-weeding
If you prefer a more hands-on approach, hand-weeding is another effective method for controlling weeds in your galangal garden. Regularly inspect your plants and remove any unwanted vegetation by hand to ensure that weeds don't have the chance to establish themselves among your precious rhizomes. Make sure to pull out the entire root system of each weed so they don't grow back quickly.
Cultivating Soil
Gently cultivating the soil around your galangal plants can also help discourage weed growth by disrupting their roots before they become established. Use a hoe or cultivator tool every few weeks during the growing season, taking care not to damage the delicate roots of your own plants in the process.
Natural Weed Suppressants
- Vinegar: A diluted vinegar solution (1 part white vinegar mixed with 10 parts water) can be used as a natural weed killer. Spray the solution directly onto weeds, being careful not to get it on your galangal plants.
- Corn Gluten Meal: This byproduct of corn processing acts as an organic pre-emergent herbicide, preventing weed seeds from germinating. Apply corn gluten meal around your galangal plants in early spring before weeds have had a chance to sprout.
By employing these strategies for controlling weeds in your galangal garden, you'll create an environment where your plants can thrive without competition from unwanted vegetation. Remember that consistency is key - regular maintenance will ensure that weeds don't gain the upper hand and negatively impact the growth and health of your precious galangal rhizomes.
Controlling weeds is an important part of keeping your galangal garden healthy and productive. To ensure the best results, it's essential to properly manage pests as well.
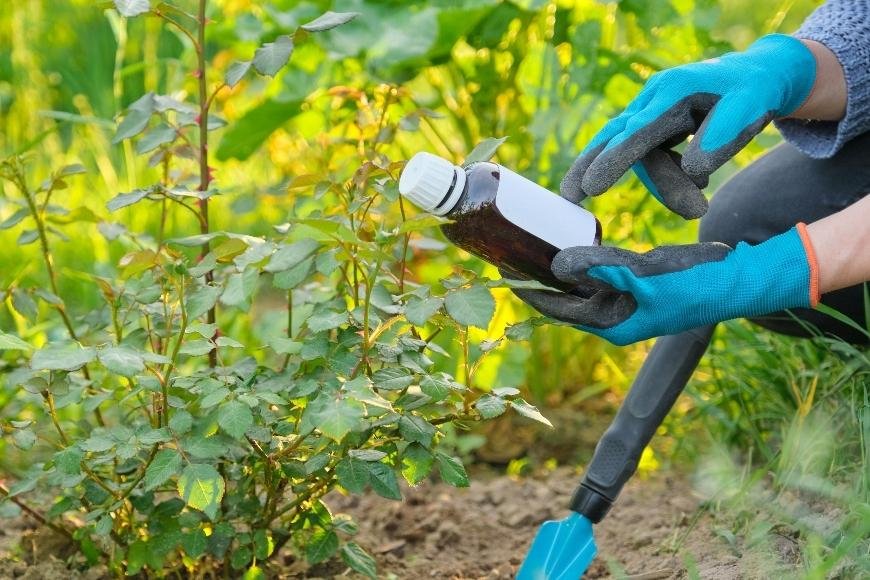
5. Pest Control
Maintaining a thriving galangal patch necessitates monitoring for any potential bugs that could wreak havoc on your plants. In this section, we'll discuss some effective methods for preventing and controlling common pests in your galangal garden.
Natural Predators
One of the best ways to protect your galangal plants from pests is by encouraging natural predators into your garden. These beneficial insects help control pest populations without resorting to chemical insecticides. Some examples of helpful predators include ladybugs, lacewings, and predatory mites. To attract these insects, consider planting companion flowers such as marigolds or dill near your galangal patch.
Insecticidal Soaps and Oils
If you notice a small infestation on your galangal plants, using insecticidal soaps or horticultural oils can be an effective way to eliminate the problem without causing harm to beneficial insects or the environment. These products work by smothering soft-bodied pests like aphids and spider mites while leaving other organisms unharmed.
- Note: Always follow label instructions when applying any pesticide product.
- Tips: Apply insecticidal soap or oil early in the morning or late afternoon when temperatures are cooler to avoid harming pollinators like bees who are active during warmer parts of the day.
Organic Pesticides
For more severe pest infestations, organic pesticides can be used as a final option, being less damaging to beneficial insects and the environment compared to synthetic chemical ones. These products are derived from natural sources and tend to be less harmful to beneficial insects and the environment compared to synthetic chemical pesticides. Some popular options include neem oil, pyrethrum, or Bacillus thuringiensis (Bt).
Remember that prevention is always better than cure when it comes to pest control in your galangal garden. Regularly inspecting your plants for signs of pests and taking action early can help keep these unwanted visitors at bay.
Pest control is a crucial part of growing galangal and should not be overlooked. Time to gather the galangal.
6. Harvesting Galangal
Growing your own galangal can be a rewarding experience, especially when it comes time to harvest those fragrant rhizomes. The best time and techniques for collecting galangal, as well as how to store it correctly, are outlined in this section.
When to Harvest
The ideal time to harvest galangal is around 8-10 months after planting. At this point, the plant should have reached its peak growth and the rhizomes will be full of flavor. However, if you're in need of some fresh galangal before then, you can carefully dig up a small portion without harming the rest of the plant.
How to Harvest
- Digging up Rhizomes: Use a garden fork or spade to gently loosen the soil around your matured plants. Be careful not to damage any nearby roots or shoots while doing so.
- Lifting Plants: Gently lift each plant out of the ground by holding onto its base near where it meets with soil level; try not to disturb too much surrounding dirt on the root system during the process.
- Cleaning Rhizomes: After removing them from their earthy home (and shaking off excess), give each one a good rinse under running water to remove any remaining debris clinging onto the surface area(s).
- Selecting Prime Specimens: Choose the largest, healthiest-looking specimens for storage purposes; smaller pieces could be used immediately for cooking applications instead.
Tips for Storing Galangal
- Fresh Storage: To keep freshly harvested galangal at its best, wrap the rhizomes in a damp paper towel and store them in an unsealed plastic bag within your refrigerator's vegetable drawer. This method will keep galangal fresh for up to two weeks.
- Freezing: If you have more galangal than you can use right away, consider freezing it. Simply cut the cleaned rhizomes into smaller pieces and place them in airtight freezer bags or containers. Frozen galangal can last for several months without losing much of its flavor or potency.
- Drying: You can also dry your harvested galangal by slicing it thinly and placing the slices on a baking sheet lined with parchment paper. Dry the slices at low heat (around 100°F/38°C) in an oven or food dehydrator until they are completely dried out - this may take several hours depending on the thickness of the slice used; once done, properly store in an air-tight container away from direct sunlight exposure.
Now that you know how to harvest and store your homegrown galangal, get ready to enjoy its unique flavors and aromas as part of various dishes like soups, curries, stir-fries - even some psychedelic concoctions if that's what interests our adventurous readers.
Harvesting galangal is a rewarding process that requires patience and skill. Exploring the various techniques for cultivating galangal in different areas of the globe is a beneficial endeavor.
7. Growing Galangal in Different Regions
Growing galangal can be a rewarding experience, especially for those who enjoy its unique flavor and potential benefits. However, it's essential to understand that this tropical plant thrives best in specific regions with suitable growing conditions. Let's explore some of the countries and areas where galangal can be successfully cultivated.
A. Southeast Asia
Galangal is native to Southeast Asia, specifically countries like Indonesia, Malaysia, Thailand, and Vietnam. In these regions, the climate is warm and humid throughout the year - perfect for nurturing healthy galangal plants. If you live in one of these countries or have similar climatic conditions (USDA zones 9-11), you'll likely find success growing your own galangal.
B. Southern United States
In the United States, gardeners living in warmer southern states such as Florida or Texas may also have luck cultivating their own patch of galangals due to their subtropical climates which closely resemble Southeast Asian weather patterns during certain parts of the year (USDA zones 8-10). With proper care and attention to soil quality (loose & well-draining) along with adequate sunlight exposure (partial shade), American growers can enjoy fresh homegrown rhizomes too.
C. Greenhouses & Indoor Gardens
If you don't reside within any of these ideal climates but still want to try your hand at growing galangals - fear not. Greenhouses and indoor gardens can provide a controlled environment where you can manipulate temperature, humidity, and light exposure to mimic the tropical conditions galangal plants love. Invest in the right tools, like grow lamps, humidifiers, and heaters if needed.
D. Adapting Galangal Cultivation for Colder Climates
If you live in colder regions but still want to give growing galangals a shot, consider planting them in pots or containers that can easily be moved indoors during harsh winter months. This way, your plants will stay protected from frost damage while continuing to thrive inside your home until warmer weather returns.
In conclusion, growing galangal is possible in various regions, including Southeast Asia, the southern United States, and even in greenhouses or indoor gardens. With the right care and attention, you can enjoy fresh homegrown galangal rhizomes regardless of where you live.
FAQs in Relation to How to Grow Galangal?
Where is the Best Place to Plant Galangal?
The ideal location for planting galangal is in well-draining, fertile soil with partial shade. Galangal thrives in warm and humid climates, so it's essential to protect the plants from frost or extreme cold temperatures. If you live in colder regions, consider growing galangal indoors or using a greenhouse.
Is it Easy to Grow Galangal?
Galangal can be relatively easy to grow if provided with proper care and suitable conditions. It requires consistent watering, adequate sunlight, protection from pests and diseases, as well as regular fertilization. With patience and attention to detail, even novice gardeners can successfully cultivate this aromatic herb.
Can You Grow Galangal from Store Bought?
You can potentially grow galangal from store-bought rhizomes if they are fresh and have visible buds or shoots on them. Plant these rhizomes in moist soil with good drainage under partial shade conditions. Keep the soil consistently damp but not waterlogged until new growth emerges.
Conclusion
Having acquired the fundamentals of galangal cultivation, it is time to put your new knowledge into action. Remember to choose a suitable location with well-draining soil and partial shade, plant the rhizomes correctly, water and fertilize regularly, control weeds and pests, and harvest at the right time.
Start your own project today by purchasing some high-quality Galangal seeds from Azarius!


