How to Grow Kratom
Learn How to Grow Kratom with our beginner's guide, covering plant selection, growing area preparation, watering, pruning, harvesting and storage.
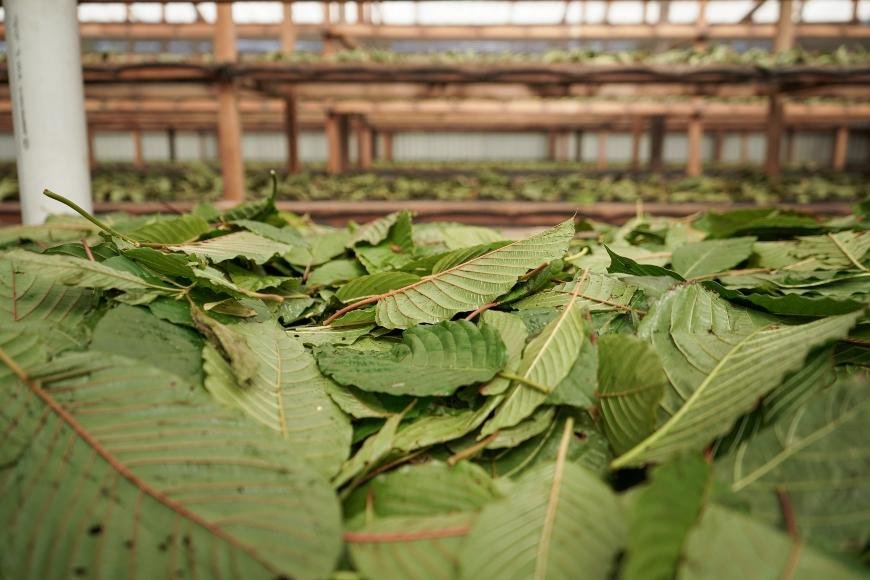
Discovering how to grow kratom can be an exciting and rewarding venture for those interested in cultivating this unique plant. Mitragyna speciosa, otherwise known as kratom, is a tropical tree native to Southeast Asia that has become renowned for its therapeutic and recreational applications. In this comprehensive guide on growing kratom plants, we will explore the essential steps needed to successfully cultivate your own thriving kratom garden.
Selecting the correct kratom plant for your requirements and inclinations is the primary step in developing a thriving garden. Next, we'll cover preparing the ideal growing area for your new addition. From there, you'll learn about planting methods using either seeds or cuttings while ensuring optimal germination rates.
Moving forward, our focus will shift towards watering and fertilizing techniques that promote healthy growth and maximize alkaloid content within your kratom leaves. Additionally, we will delve into pruning practices that help maintain strong trees with high yields of potent foliage.
Finally, after learning how to grow kratom successfully from start to finish, we’ll share tips on harvesting and storing these precious leaves so you can enjoy their benefits year-round.
Table of Contents:
- Choosing the Right Kratom Plant
- Understanding Kratom Strains
- Selecting Your Ideal Kratom Plant
- Purchasing Kratom Seeds or Cuttings
- Preparing the Growing Area
- Planting Kratom Seeds or Cuttings
- Watering and Fertilizing Kratom Plants
- Pruning Kratom Plants
- Harvesting Kratom Leaves
- Storing Kratom Leaves
- Conclusion
1. Choosing the Right Kratom Plant
Growing your own kratom plant can be a rewarding and fascinating experience, but it all starts with selecting the right type of kratom for your needs. There are several different strains of kratom, each with its unique effects and characteristics. In this section, we'll explore some popular varieties and provide tips on how to choose the best one for you.
Understanding Kratom Strains
Kratom is native to Southeast Asia, where it has been used for centuries as a natural remedy for various ailments. The leaves of the Mitragyna speciosa tree contain alkaloids such as mitragynine and 7-hydroxymitragynine that produce different effects depending on their concentration levels in each strain.
- Red Vein: Known for its calming effects, red vein kratom is ideal if you're looking to relax or alleviate pain without feeling overly sedated.
- White Vein: This energizing strain provides increased focus and mental clarity while also offering mild pain relief properties.
- Green Vein:A balanced option between red and white veins; green vein kratoms offer moderate stimulation alongside relaxation benefits making them perfect daytime strains.
- Yellow Vein:An uncommon variety created through a specialized drying process; yellow vein offers similar effects to green vein strains but with longer-lasting results due to higher alkaloid content levels. li>
Selecting Your Ideal Kratom Plant
Once you've identified what you're hoping to get out of kratom, review the strain characteristics outlined above and pick a plant that meets those objectives. Are you seeking pain relief, relaxation, or an energy boost? Once you've identified your desired effects, refer back to the strain descriptions above and choose a plant that aligns with those goals.
It's also essential to consider the climate in which you live when selecting a kratom plant. Kratom thrives in tropical environments similar to its native Southeast Asia habitat; therefore, if you reside in a colder region, it may be necessary to grow your kratom indoors or invest in proper cold protection measures.
Purchasing Kratom Seeds or Cuttings
Once you've chosen the right type of kratom for your needs and growing conditions, it's time to purchase seeds or cuttings from reputable sources like EthnoDirect. Ensure they provide detailed information about their products' origins and quality assurance practices so that you can start off on the right foot with healthy plants.
Selecting the ideal kratom plant is an essential step for guaranteeing a bountiful yield. With careful consideration, you can ensure that your chosen strain will provide you with quality results and maximize its potential. Now it's time to prepare the growing area for optimal conditions so that your plants thrive.
2. Preparing the Growing Area
Before you start planting your kratom seeds or cuttings, it's essential to prepare a suitable growing area that meets all the requirements for this unique plant. Kratom thrives in specific conditions, and by providing an optimal environment, you'll ensure healthy growth and maximum yields.
Soil Type
Kratom plants prefer well-draining soil, rich in organic matter. A mix of peat moss, perlite, and compost is ideal for promoting root development and retaining moisture without causing waterlogging issues. The pH level should be slightly acidic to neutral (5.5-6.5) as kratom doesn't tolerate alkaline soils well.
Drainage
Poor drainage can lead to root rot problems in your kratom plants; therefore, ensuring proper drainage is crucial when preparing your growing area. If you're using containers for indoor cultivation or if outdoor soil has poor drainage properties, consider adding sand or gravel at the bottom of pots or digging trenches around the planting site to improve water flow.
Light Requirements
- Sunlight: Kratom requires plenty of sunlight throughout its growth cycle - ideally between 12-14 hours per day during summer months and at least 6 hours during winter months.
- Growth Stage: Younger plants may need partial shade protection from direct sun exposure until they become more established; however mature trees thrive under full sun conditions once acclimated properly over time.
- Temperature: Kratom is a tropical plant, and it prefers warm temperatures between 70-90°F (21-32°C). It's essential to maintain these temperature ranges for optimal growth. If you live in colder climates, consider growing kratom indoors or using greenhouses to regulate the environment.
Other Considerations
In addition to soil type, drainage, and light requirements, there are other factors that can impact your kratom plants' health:
- Air Circulation: Good air circulation helps prevent fungal infections and pests from attacking your plants. Ensure proper spacing between trees when planting outdoors or use fans if cultivating indoors.
- Pest Control: Keep an eye out for common garden pests like aphids and spider mites; implementing organic pest control methods such as introducing beneficial insects or applying neem oil can help protect your kratom plants without resorting to harsh chemicals.
- Mulching: Adding a layer of mulch around the base of your kratom tree will help retain moisture in the soil while also suppressing weed growth. Organic materials like straw or wood chips work well as mulch options.
Taking all these factors into account when preparing your growing area will set up a strong foundation for healthy kratom plant development throughout its lifecycle. Remember that each plant may have slightly different needs depending on its specific strain; therefore adjusting conditions accordingly is key for successful cultivation efforts.
Before beginning to cultivate Kratom, it is critical to ensure that the growing area is properly prepared. With the right preparation complete, it's time to move on to planting either seeds or cuttings of Kratom.
3. Planting Kratom Seeds or Cuttings
Growing kratom from seeds or cuttings is an exciting journey, as you'll be nurturing your own plants and eventually harvesting the leaves for consumption. Guiding you through the planting process of kratom seeds or cuttings, this section will ensure a successful growth.
Planting Kratom Seeds
To start with kratom seeds, it's essential to obtain fresh and viable ones from a reputable source. Bear in mind that these seeds have a brief lifespan and can quickly become nonviable once taken from the mother plant.
- Soil Preparation: Prepare a well-draining soil mix by combining equal parts potting soil, perlite, and peat moss. Ensure that the pH level of your soil is between 5.5-6.5 for optimal germination.
- Sowing Seeds: Scatter the tiny kratom seeds on top of your prepared soil surface without burying them too deep (1-2 mm). This allows light exposure necessary for germination.
- Maintain Humidity: Cover your seed tray with plastic wrap to create humidity levels similar to those found in tropical environments where kratom naturally grows. Make sure there's enough air circulation by poking small holes in the plastic wrap using toothpick-sized punctures.
- Growth Conditions: Place your seed tray under indirect sunlight or fluorescent lights at room temperature (around 75°F) until sprouts appear within two weeks if conditions are favorable.
Taking Kratom Cuttings
If you have access to a mature kratom plant, taking cuttings is another way to propagate your own plants. Here's how:
- Choose the Right Branch: Select a healthy branch with at least two nodes (points where leaves attach) and make a clean diagonal cut about 6 inches below the lowest node.
- Treat Cuttings: Dip the cut end of your cutting into rooting hormone powder or gel. This will encourage root development in your new plant.
- Planting Cuttings: Plant the treated cutting into prepared soil mix mentioned earlier, ensuring that at least one node is buried beneath the soil surface.
- Maintain Humidity: Similar to seeds, cover your planted cutting with plastic wrap for humidity control and provide indirect sunlight or fluorescent lights until roots develop within three weeks if conditions are favorable.
Patience is key when growing kratom from seeds or cuttings since it may take several attempts before successfully establishing a thriving plant. Once you see signs of growth, continue caring for your young plants by following proper watering, fertilizing, and pruning techniques as outlined in this guide.Learn more.
Planting Kratom seeds or cuttings is a great way to get started with growing your own kratom plants. Now, it's time to gain knowledge on how to give your kratom plants the best care with proper watering and fertilization for healthy growth.
4. Watering and Fertilizing Kratom Plants
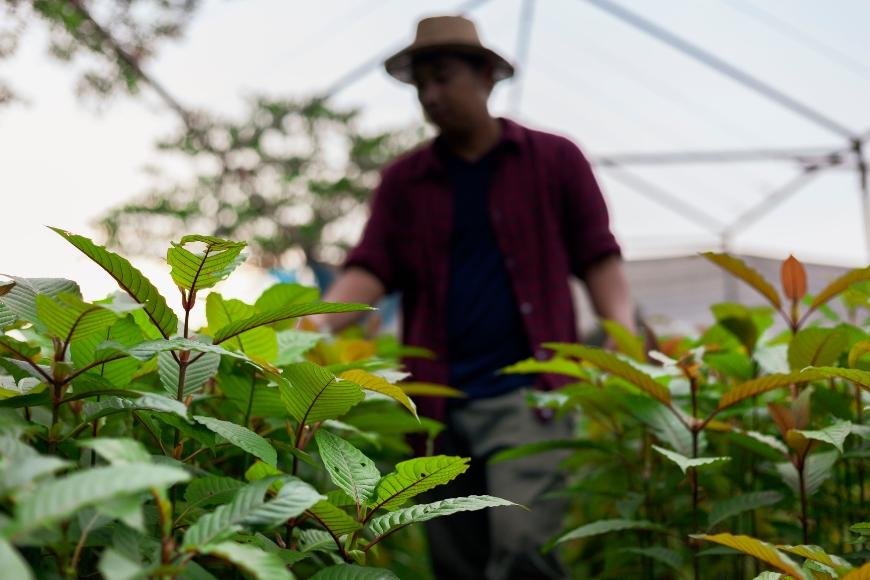
Growing healthy kratom plants requires a proper balance of water and nutrients. In this section, we will discuss the best practices for watering and fertilizing your kratom plants to ensure optimal growth.
Watering Your Kratom Plant
Kratom plants thrive in moist soil but can be sensitive to overwatering or underwatering. It is essential to strike the right balance when it comes to providing moisture for your plant's roots:
- Maintain consistent moisture levels: Keep the soil consistently moist by checking it regularly. If the top inch of soil feels dry, it's time to water your plant.
- Avoid overwatering: Overwatered kratom plants may develop root rot, which can lead to stunted growth or even death. To prevent this issue, allow excess water to drain away from the plant after each watering session.
- Mimic natural rainfall patterns: Since kratom originates from Southeast Asia where rain is abundant during certain seasons, try replicating these conditions by providing more frequent watering during periods that would typically see increased rainfall in its native habitat.
Fertilizing Your Kratom Plant
In addition to adequate hydration, supplying your kratom plant with proper nutrients plays a crucial role in promoting robust growth and potent leaves. Here are some tips on how you should approach fertilization for your precious botanicals:
- Select an appropriate fertilizer: strong>The ideal fertilizer for growing kratom should have high nitrogen content as well as balanced phosphorus and potassium levels (such as N-P-K ratios of 20-10-10). Fertilizers with a high nitrogen content can be sourced from your local gardening store or online.
- Apply fertilizer regularly: Kratom plants benefit from regular applications of fertilizer, typically every two to four weeks during the growing season. This helps ensure that they receive a steady supply of nutrients for optimal growth.
- Avoid over-fertilizing: Too much fertilizer can harm your kratom plant by causing nutrient burn or salt buildup in the soil. Always follow the recommended application rates on the product label and monitor your plant's health closely after each feeding session. li>
In summary, maintaining proper watering and fertilization practices is essential for nurturing healthy kratom plants with potent leaves. By following these guidelines, you'll be well on your way to cultivating a thriving botanical specimen that will reward you with an abundant harvest.
Watering and fertilizing Kratom plants is an essential part of keeping them healthy. By employing the correct watering and fertilization practices, it is possible to guarantee your Kratom plants will continue to flourish for a long time. Now let's move on to pruning Kratom Plants in order to keep them growing strong.
5. Pruning Kratom Plants
Pruning your kratom plants is an essential step in ensuring healthy growth and increasing yields. By removing dead or damaged leaves, you promote better air circulation and light penetration, which helps the plant grow more vigorously. In this section, we will outline some effective techniques for pruning kratom plants.
A) When to Prune Your Kratom Plant
The best time to prune your kratom plant is during its vegetative stage when it's actively growing new leaves and branches. This usually occurs between spring and early summer but can vary depending on the climate of your region. Checking your plant regularly for any signs of excessive growth or unhealthy foliage can help you decide when it's time to prune.
B) Tools Needed for Pruning
- Gardening gloves: Wearing gloves protects your hands from cuts while handling sharp tools.
- Clean pruning shears: A sharp pair of pruning shears allows clean cuts that heal faster than jagged ones made by dull blades (learn how to maintain them here).
- Rubbing alcohol: Disinfecting the blades with rubbing alcohol before use prevents the spread of diseases among plants.
C) Techniques for Effective Pruning
- Selective removal: Begin by removing any dead, yellowed, or damaged leaves from the lower part of the plant as these can harbor pests and diseases. Also remove any small branches that are not receiving adequate sunlight due to overcrowding.
- Branch trimming: Trim back any overly long branches to encourage bushier growth. Cut just above a node (the point where leaves emerge) at a 45-degree angle, which promotes faster healing and new branching.
- Topping: If your kratom plant is growing too tall, you can cut the main stem's tip to promote lateral branching. This technique is known as topping and helps create a more compact, bushy plant (learn more about topping here, although this guide focuses on cannabis plants).
Maintaining proper pruning practices will not only keep your kratom plants healthy but also ensure optimal leaf production for future harvests. Remember that each plant may require different levels of care depending on its age, size, and overall health - so always monitor their progress closely.
Pruning Kratom plants is an essential step to ensure the health and growth of your kratom crop. Now that you've trimmed your kratom plants, it's time to reap their leaves.
6. Harvesting Kratom Leaves
Knowing when and how to harvest kratom leaves is essential for obtaining the maximum potency and quality from your plants. In this section, we will discuss the best time to harvest, signs of maturity, and proper techniques for harvesting kratom leaves.
A. Best Time to Harvest
The ideal time to harvest kratom leaves depends on their maturity level and coloration. Typically, a kratom plant grown from seed or cutting can take roughly one to two years before it reaches its peak alkaloid content. The alkaloids present in kratom, such as mitragynine and 7-hydroxymitragynine, are responsible for its psychoactive effects.
- White Vein: White vein leaves are harvested earlier than other varieties when they have light green veins running through them.
- Green Vein: Green vein leaves should be harvested once the veins become darker green but before they turn red.
- Red Vein: Red vein leaves can be harvested later when their veins take on a reddish hue due to increased alkaloid content.
B. Signs of Maturity
In addition to observing the coloration of the leaf veins, there are several other indicators that your kratom plant is ready for harvesting:
- The branches become more robust with thicker stems;
- The overall height of the plant reaches at least three feet tall;
- . The leaves emit a distinct aroma when crushed or rubbed between your fingers;
- The leaves have a glossy appearance and are not wilted.
C. Harvesting Techniques
To harvest kratom leaves, follow these steps:
- Select the right leaves: Choose mature, healthy-looking leaves with the desired vein coloration for harvesting.
- Pick the leaves carefully: Gently twist and pull each leaf from its stem to avoid damaging the plant. Do not use scissors or other tools that may cause unnecessary harm to your kratom plant. Clean the harvested leaves: Rinse them thoroughly under running water to remove any dirt or debris before drying them out..
By following these guidelines, you can ensure that you're harvesting high-quality kratom leaves at their peak potency. In our next section, we will discuss how to properly store your harvested kratom for long-lasting freshness and effectiveness.
Harvesting Kratom is a critical part of cultivating this plant, and with proper attention it can yield good results. The next step is to properly store your harvested Kratom leaves for optimal preservation.
7. Storing Kratom Leaves
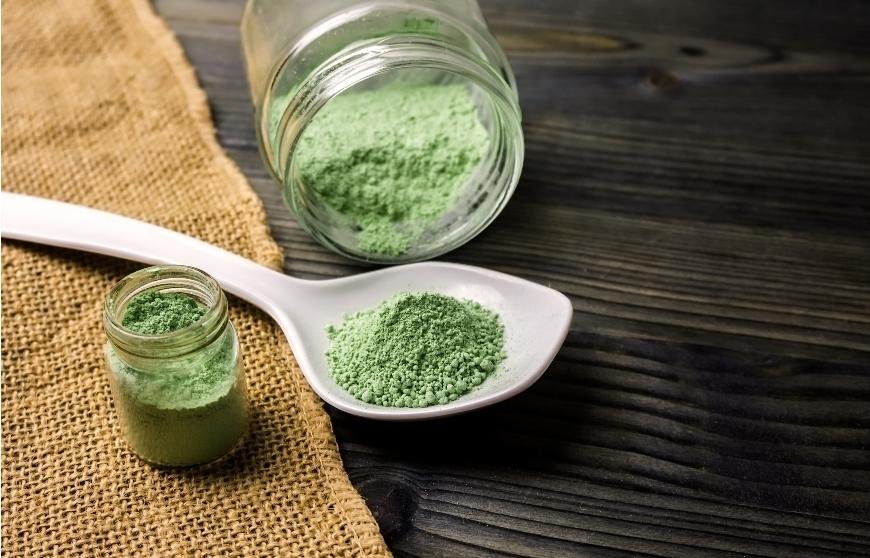
Proper storage of your harvested kratom leaves is crucial to maintain their potency and freshness over time. This article covers the best methods for preserving kratom leaves, such as drying processes, suitable storage environments and ways to avoid contamination.
Drying Kratom Leaves
The first step in preserving your kratom harvest is drying the leaves. Drying not only extends the shelf life but also enhances the alkaloid content of the plant material. Follow these steps for effective drying:
- Cleanliness: Ensure that you thoroughly wash your hands before handling freshly picked kratom leaves to avoid any contamination.
- Air circulation: Place the washed leaves on a clean surface or tray with ample space between them to allow proper air circulation.
- Indirect sunlight: Expose the trays containing kratom leaves to indirect sunlight or place them under a fan in a well-ventilated area for even drying.
- Daily rotation: Rotate and flip each leaf daily during its entire duration of exposure (usually about five days) until they are completely dry and crisp.
Ideal Storage Conditions
To ensure long-lasting freshness and potency, it's essential to store dried kratom leaves under specific conditions. Consider these factors when choosing an appropriate storage location:
- Airtight containers: Pack dried kratom into resealable bags or glass jars with tight-fitting lids that keep out moisture, oxygen, and light - all elements known to degrade alkaloids over time. You can find some suitable options at local stores or online.
- Dark and cool environment: Store the airtight containers in a dark cupboard, pantry, or drawer away from direct sunlight. The temperature should be maintained between 60-70°F (15-21°C) to ensure optimal storage conditions.
- Avoid moisture: Keep kratom leaves away from humid areas like bathrooms and kitchens to prevent mold growth.
Tips for Preventing Contamination
To maintain the quality of your stored kratom leaves, it's essential to take precautions against contamination. Here are some tips:
- Labeling: Clearly label each container with the strain name and date of harvest to avoid confusion.
- No cross-contamination: Use separate containers for different strains or batches to prevent mixing them accidentally.
- Clean utensils: Always use clean spoons or scoops when handling your stored kratom leaves; never use your hands directly as this can introduce bacteria into the container. li > Regular inspection : strong > Check on your stored kratom regularly , looking out for any signs of mold , pests , or other contaminants . If you spot any issues , discard affected material immediately .
Conclusion
Growing kratom is a rewarding experience that can provide you with the highest quality of leaves. With proper care and attention, your plants will thrive and produce an abundant harvest for many years to come. Water your plants frequently, supply them with the right nutrients, prune judiciously and harvest when appropriate to maximize yield. Finally, store your harvested leaves properly in order ensure their freshness for as long as possible - so go ahead and start growing kratom today.

